
How To Replace Wood Deck Boards: A Guide by Quick Sidekick
If your deck has begun to show signs of wear and tear, don’t worry. At Quick Sidekick, we specialize in wood deck repair, serving North New Jersey, and ensuring that your deck is safe, functional, and aesthetically pleasing. We recently had the pleasure of revitalizing a deck in Hoboken, New Jersey, where we replaced not just the deck boards but also a few of the joists, ensuring optimal stability and longevity. Today, we’re sharing a step-by-step guide on how to replace wood deck boards, inspired by our recent project.
In this Blog we are focussing on only replacing the wood deck boards, joist, and joist holder please see the attached picture to show you what they are.
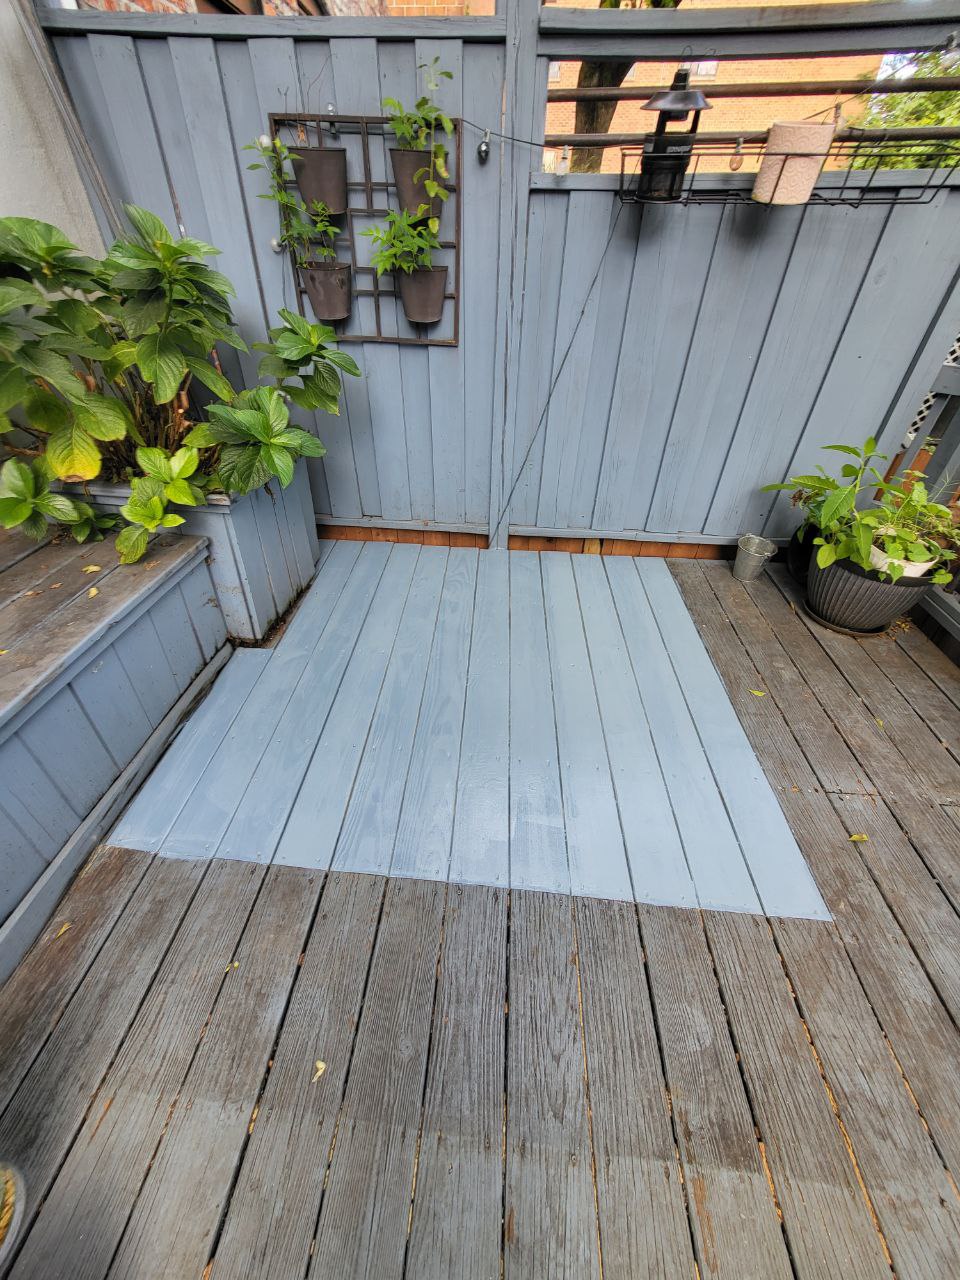
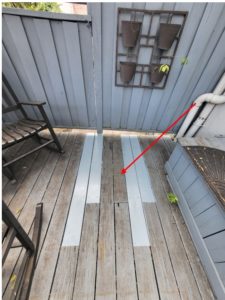
The wood boards on a deck are called “deck boards” 
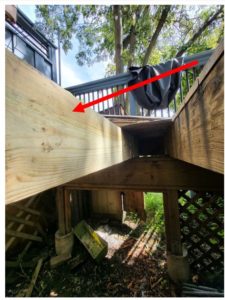
The wood boards that are under the deck boards that gives your deck boards support are called “Joist”

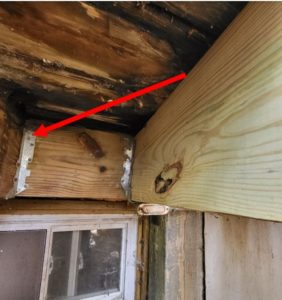
The metal holder that holds the joist together is called a “Joist Holder”
Tools Needed for Wood Deck Repair:
- Safety Gear:
- Safety glasses
- Gloves
- Hearing protection
- Dust mask or respirator (if dealing with chemicals or dust)
- Pry Bar or Crowbar: For removing damaged boards and aiding in adjustments.
- Hammer or Mallet: For adjustments and removing or inserting nails.
- Drill or Screwdriver: For adjusting screws during inspection and securing boards.
- Waste Container or Bags: For proper disposal of damaged boards.
- Spirit or Laser Level: For ensuring the level of joists and other components.
- Tape Measure: For measuring distances between joists and the length of new boards.
- Utility Knife or Chisel: For removing small sections of damaged wood or to clean up rough spots.
- Plastic Sheet or Tarp: For protecting the surrounding area.
- Cleaning Brushes or Brooms: For cleaning the work area.
- Circular Saw or Hand Saw: For cutting the boards to the required length.
- Carpenter’s Pencil or Chalk Line: For marking cut lines on the boards.
- Drill/Driver: For installing screws or other fasteners.
- Speed Square or Framing Square: For ensuring cut lines are straight and verifying proper alignment.
- Application Brush:For applying wood preservative to exposed areas.
Materials Needed:
- Replacement Decking Boards: For replacing the damaged ones.
- Screws or Nails: For securing the new boards to the joists.
- Wood Preservative:For protecting exposed wood areas against rot and pests.
Preservatives Options:
- Propiconazole-Based Preservatives:Fungicide protecting against a broad range of fungi.
- Borates (Borax): Protects against fungi, insects, and termites.
- Copper-Based Preservatives: Protects against rot, decay, and insect damage.
- Oil-Based Preservatives: Provides excellent protection against fungi and insects but is usually more toxic.
- Water-Repellent Preservatives: Helps protect against water damage and decay.
Step 1: Safety Preparations and Pre-Inspection: The Pillars of Effective Wood Deck Repair
Before embarking on any wood balcony repair or wood deck repair, ensure you’re equipped with the necessary safety gear. Start by inspecting the entire deck, identifying which boards and components need replacement. In our Hoboken project, we discovered that some joists and their hangers also required replacement.
How To Do Safety Preparations For Wood Deck Board Replacement
Before any wood deck repair can begin, it’s crucial to take adequate safety precautions:
- Wear Safety Gear: Equip yourself with the necessary safety gear such as gloves, safety glasses, and hearing protection if using power tools.
- Clear the Area: Ensure that the working area is free from obstructions and that pets and people are safely away from the site.
- Secure the Perimeter: Put up safety barriers or tapes around the work area to prevent accidental access.
- Tool Safety: Check all the tools to ensure they are in good working order and know how to use them properly to avoid any accidents.
How To Do A Pre-Inspection For Replacing Wood Deck Boards For Deck Repair
A detailed pre-inspection of the deck is critical to identify all areas that need attention:
Identify Damaged Boards: Walk around the deck and closely inspect each board for signs of damage, decay, or rot.
Assess Structural Integrity: Inspect the underlying joists, beams, and other structural components to ensure they are sturdy and free from damage. During our recent project in Hoboken, New Jersey, this step was essential in identifying additional components that needed replacement, such as joists and joist hangers.
Estimate Extent of Repair: After assessing the damage, determine whether it’s isolated to a few boards or more extensive, requiring substantial replacement or additional support structures.
Photographic Evidence: Take pictures of all damaged areas; this aids in planning the repair process and serves as documentation of the initial state of the deck.
Step 2: Removal of Damaged Boards: A Critical Step in Wood Deck Repair
This step is critical in the process of wood deck repair. Use a pry bar or a screwdriver to carefully remove the damaged boards. This step was paramount in our repair deck boards project in Hoboken, where we meticulously removed the damaged components to ensure the integrity of the remaining structure.
Equipment Needed For Removal Of Damaged Wood Deck Boards For Deck Repair:
For this stage, several tools and pieces of equipment are essential:
- Pry Bar or Crowbar: To leverage up the damaged boards.
- Hammer: To remove any protruding nails or to help in prying up the boards.
- Drill or Screwdriver: To unscrew any screws that are holding the boards in place.
- Safety Gear: Safety glasses, gloves, and hearing protection when using power tools.
- Waste Container or Bags: To dispose of the damaged boards properly.
How To Remove Damaged Wood Deck Boards For Deck Repair

- Prying Up Boards: Carefully use the pry bar or crowbar, leveraging against a solid point, to lift the damaged boards away from the joists. Proceed gently to avoid damaging adjacent boards or underlying structures.
- Disposal: Once the damaged boards are removed, dispose of them properly in a waste container or bags, ensuring the worksite remains clean and hazard-free.
- Inspection of Exposed Areas: After removing the boards, inspect the exposed joists and other structures for damage, and assess whether they also need repair or replacement.
Importance of Proper Removal:
Proper removal of damaged boards is crucial in the wood deck repair process. It ensures that the new boards will be supported by a solid and sound structure, preventing future problems and ensuring the longevity and safety of the deck. This meticulous removal process was instrumental in our recent project in Hoboken, allowing us to accurately assess and address the extent of the damage.
Step 3: Inspection and Preparation of the Area: Laying the Groundwork for Successful Wood Deck Repair
After removing the damaged boards, thoroughly inspect the underlying structures for any signs of rot or damage. A detailed inspection is crucial for effective deck wood rot repair. Cleaning the area of debris and ensuring the joists are in optimal condition is crucial before installing new boards.
How to inspect wood deck boards
For the Inspection and Preparation of the Area during a wood deck repair project, having the right tools is crucial to ensure accuracy and effectiveness. Here are the tools typically needed for this stage:
Spirit Level or Laser Level
- Purpose: To check the level of the joists and other structural components, ensuring that they are flat and even.
- How to Use: Place the spirit level on top of the joists and adjust until the bubble is centered, or use a laser level to project a level line along the tops of the joists.
Tape Measure
- Purpose: To measure the distance between joists and check the uniformity of spacing.
- How to Use: Extend the tape measure between the joists to ensure equal spacing.
Screwdriver or Drill
- Purpose: To tighten or loosen screws during the inspection and preparation process, especially if adjustments are needed.
- How to Use: Use the appropriate bit or driver to adjust screws on joists or other structural components.
Hammer or Mallet
- Purpose: To adjust joists or other components, and to remove or insert nails if needed.
- How to Use:Use the hammer or mallet to make adjustments to the wooden components or to secure them with nails.
Pry Bar or Crowbar
- Purpose: To remove any damaged or rotten wood found during inspection.
- How to Use: Insert the flat end of the bar under the damaged wood and leverage it upwards to remove it.
Utility Knife or Chisel
- Purpose: To remove small sections of damaged wood or to clean up rough spots.
- How to Use: Carefully cut or chisel away damaged or unwanted sections of wood.
Plastic Sheet or Tarp
- Purpose: To cover and protect the area around the work site.
- How to Use: Spread the sheet or tarp around the work area to catch debris and protect surfaces.
Cleaning Brushes or Brooms
- Purpose:To clean the work area of debris, dust, and dirt before starting the preparation.
- How to Use: Sweep or brush away any loose debris from the work area.
Wood Preservative and Application Brush
- Purpose: To treat exposed areas and protect them from rot and pests.
- How to Use:Apply the wood preservative to all exposed areas with the brush, ensuring complete coverage.
Personal Protective Equipment (PPE)
- Purpose: To protect against injuries from splinters, dust, chemicals, and other hazards.
- Items: Safety glasses, gloves, and a dust mask or respirator if dealing with chemicals or dust.
Inspect Joists and Structural Components: Examine the joists and other structural components, looking for signs of rot, damage, or instability. Evaluate the integrity of the joists by probing them with a screwdriver, checking for soft or damp spots that could indicate rot.
Ensuring that the joists are level and uniform is crucial for the stability and longevity of the deck. Below are the steps and considerations to guarantee level and uniform joists:
Inspection and Measurement:
- Use a spirit level or a laser level to check the level of each joist.
- Measure the distance between each pair of joists to ensure uniform spacing. Uniform spacing is crucial to distribute the load evenly across the deck.
- Examine each joist for any signs of warping, twisting, or bending.
Adjusting the Joists:
- If any joists are found to be uneven or not level, they need to be adjusted.
- Use a plane or a power sander to shave high points off joists that are above the desired level.
- If a joist is too low, shim it to the proper height. Shims should be made of a suitable, durable material that can withstand the elements.
- Check and adjust the level and uniformity repeatedly during the adjustment process to ensure accuracy.
Securing the Joists:
- Once all the joists are level and uniform, secure them properly.
- Use appropriate fasteners such as joist hangers, screws, or nails to secure the joists to the ledger board and beam securely.
- Ensure that all metal components like screws and joist hangers are free from rust and corrosion.
Double-Check Measurements:
- After adjusting and securing, double-check the level and spacing of each joist.
- Ensure that the tops of the joists are flush and even, providing a flat surface for the deck boards.
Treat and Protect the Joists:
- Once level and uniform, apply a suitable wood preservative to protect the joists from moisture and pests, if they are not already treated.
- Consider installing a joist tape over the tops of the joists. It creates a barrier between the joists and the deck boards, preventing water accumulation and prolonging the life of the joists.
How To Treat Exposed Areas
When damaged boards are removed or new boards are cut to size, new wood surfaces are exposed, which may be susceptible to moisture, insects, and decay. It is crucial to apply a wood preservative to these exposed areas to protect the wood and prolong the life of the deck.
Wood Preservatives
Wood preservatives are substances used to enhance the durability and lifespan of wood by protecting it against fungi, insects, and other deteriorative factors. Here are some common types of wood preservatives:
- Copper-Based Preservatives: These are common and effective preservatives, which include variants like Alkaline Copper Quaternary (ACQ) and Copper Azole. They protect against rot, decay, and insect damage.
- Borates (Borax): Borates are water-soluble preservatives that are effective against fungi, insects, and termites. However, they are not suitable for areas with direct soil or water contact due to leaching.
- Oil-Based Preservatives: Such as creosote and pentachlorophenol, provide excellent protection against fungi and insects but are more toxic and have more stringent handling requirements. These are usually best for professional use.
- Water-Repellent Preservatives: These help protect against water damage and decay by repelling water from the wood surfaces, often used in conjunction with other preservatives.
- Propiconazole-Based Preservatives: These are fungicides that protect against a broad range of fungi causing decay and rot.
Application Process
Clean the Wood Surface: Ensure that the wood is clean and free from dust, dirt, and debris.Apply the Preservative: Use a brush or spray to apply the wood preservative to the exposed areas, ensuring full coverage. Let it Dry: Allow sufficient time for the preservative to dry before installing the new boards or applying any sealant or paint.
- Check for Pests: Look for signs of termites or other pests that could compromise the wood’s integrity. Presence of pests may require additional pest control measures.
- Evaluate Metal Components: Inspect any metal components such as joist hangers, nails, and screws for signs of rust or corrosion, replacing them as needed.
Step 4: Measuring, Cutting, and Installing For New Wood Deck Boards

Measure the area precisely and cut the new boards to the exact length needed. Treating the cut ends with a wood preservative is a crucial step in wood deck repair, especially if the boards are not pre-treated. Align the boards properly on the joists, securing them with screws or nails. This precision is evident in our deck wood replacement project in Hoboken, ensuring a seamless finish and optimal durability.
Tools Required:
- Tape Measure:To accurately measure the length of the new boards.
- Circular Saw or Hand Saw: To cut the boards to the required length.
- Carpenter’s Pencil or Chalk Line:To mark the cut lines on the boards.
- Drill/Driver: To install screws or other fasteners when securing the new boards.
- Screws or Nails:To secure the new boards to the joists.
- Speed Square or Framing Square: To ensure cut lines are straight and to verify the proper alignment of the boards.
- Safety Gear:Safety glasses, ear protection, and gloves to protect against injuries while cutting and installing the boards.
- Wood Preservative and Brush:To treat cut ends of the boards if they are not pre-treated.
Measuring the Boards:
-
- Use a tape measure to accurately measure the required length of the new boards. Double-check the measurements to avoid errors.
Marking and Cutting the Boards:
-
- Use a carpenter’s pencil or chalk line to mark the cut lines on the boards, ensuring they are straight using a speed square or framing square.
- Secure the board, ensuring it’s stable, and use a circular saw or hand saw to carefully cut along the marked line. Maintain a steady hand to ensure a clean, straight cut.
- Treat the cut ends with a suitable wood preservative to protect against rot and pests if they are not pre-treated.
Installing the Boards:
-
- Place the cut boards on the joists, ensuring proper alignment and spacing.
- Use a drill/driver to drive screws or a hammer to insert nails through the boards into the joists. Ensure that the fasteners are evenly spaced and not too close to the edges to avoid splitting the wood.
- Verify the boards are secure and flush with the surrounding boards.
Final Adjustments:
-
- Once the boards are installed, inspect the entire deck to ensure that all boards are secure and there are no protruding nails or screws.
- Make any necessary adjustments to ensure the safety and longevity of the deck.
Step 5: Finishing and Inspection
If the new boards are not pre-finished, seal, stain, or paint them post-installation to protect against the elements. Conduct a thorough inspection to ensure the safety and longevity of your deck, checking for any protruding nails or screws and making any necessary adjustments. This meticulous inspection is a staple in our wood deck repair services, ensuring the longevity and safety of your deck.
In this pivotal step, all the previous stages’ efforts culminate into a final review and refining process, ensuring the output meets the predetermined standards and specifications. This step is crucial for maintaining high-quality standards and identifying any discrepancies or defects before the final approval and delivery.
Sub-Processes Involved:
Final Adjustments & Refinements:
Refining and making final adjustments to the project/product to ensure that it aligns perfectly with the requirements and expectations.
Detailing:
Paying attention to the minute details and adding finishing touches to enhance the overall appearance and functionality.
Quality Assurance:
Conducting thorough quality checks and tests to ensure the final output is free from defects and meets the quality standards.
Inspection:
Rigorous examination of the final product/project to confirm compliance with the established norms, regulations, and specifications.
Identifying any anomalies or discrepancies and rectifying them immediately.
Documentation:
Completing and reviewing all necessary documentation related to finishing and inspection processes, ensuring all modifications and results are recorded accurately.
Final Approval:
Obtaining final approval from the authorized personnel or stakeholders, confirming the project/product’s readiness for delivery or implementation.
Objectives:
- To deliver a flawless final product/project that adheres to the established standards and specifications.
- To identify and rectify any issues or discrepancies before the final delivery.
- To ensure customer satisfaction and maintain organizational reputation through consistent quality.
Importance:
The Finishing and Inspection step is imperative as it acts as the last line of defense against any potential errors or defects that might have been overlooked during the previous stages. It guarantees that the end-users receive a high-quality, reliable product or service, thereby ensuring customer satisfaction and maintaining the integrity and reputation of the organization or individual involved.
How Much Does It Cost To Replace Wood Deck Boards
How much does it cost to replace a few wood deck boards? In our Hoboken project, we completed the job in a full day, with the labor cost amounting to $750. It’s a small price to pay for a deck that’s safe, visually appealing, and durable, ready to withstand the elements and the test of time.
Conclusion
When it comes to rotten deck boards or any form of wood deck repair, Quick Sidekick is your go-to wood deck repair contractor serving North New Jersey. For those searching “wood deck repair near me”, look no further. Our recent project in Hoboken is a testament to our commitment to quality, precision, and customer satisfaction in deck wood replacement and repair.
Remember, regular maintenance is the key to a long-lasting deck. Keep an eye out for signs of wear and damage, and don’t hesitate to reach out to professional wood deck repair contractors like Quick Sidekick for timely interventions. Whether it’s a simple repair or a comprehensive overhaul, we’ve got your back!
For more information, or if you’re in need of wood deck repair services, don’t hesitate to [contact us]
Check out our carpentry page for more information Carpentry Website Page
